


Rolling Ball 3D
1. Rolling Ball 3D Overview
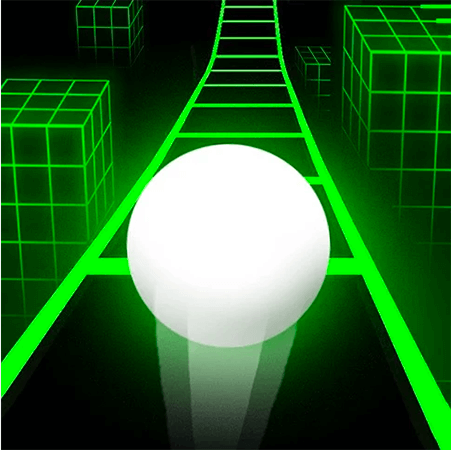
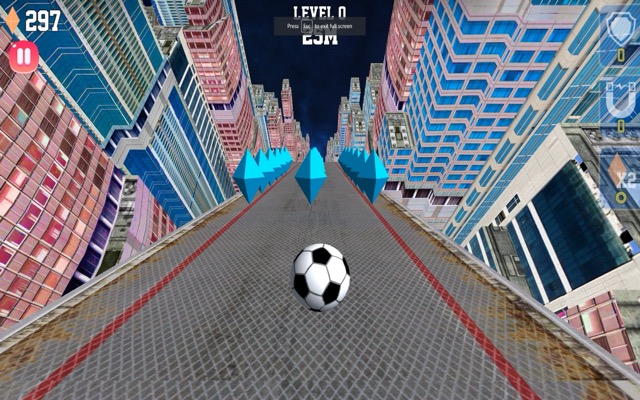
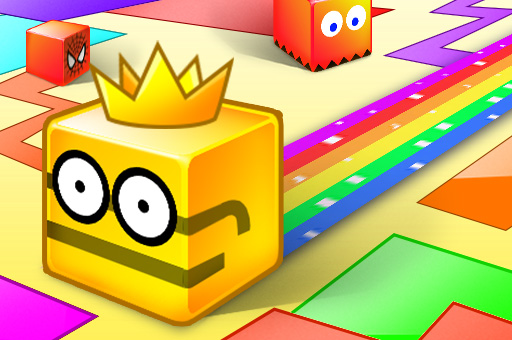
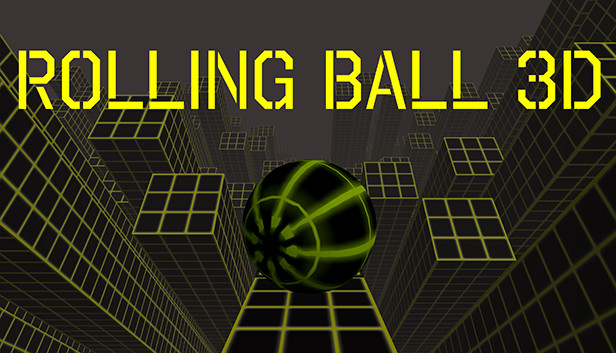
Rolling Ball 3D is an endless neon runner that takes the Slope formula and supercharges it with crystals, power-ups, and a shifting, obstacle-rich world that never behaves quite the same way twice. The glowing neon environment is immediately familiar, but the layered mechanics beneath it give the game a depth and replayability that pure survival runners can't match.
The core challenge is unchanged: roll a 3D ball down an infinite series of interconnected ramps at speed, reacting to obstacles and edges before they end the run. What makes Rolling Ball 3D distinct is what happens around that core loop. Blue crystals scattered across the ramps give every run a collection objective that runs parallel to survival. Waving platform sections introduce a dynamic physical environment where the ground beneath the ball is actively moving, not just structurally complex. Shifting obstructions change position mid-run, making previously memorised hazard patterns unreliable. And power-ups — purchasable with collected crystals — provide targeted run advantages that directly extend what you're capable of on each attempt.
The world is built entirely from neon geometry: glowing ramps, lit platform edges, and crystal clusters that catch the light of the environment. At high speed, the neon aesthetic isn't just visual atmosphere — it's functional clarity. Every platform edge glows distinctly, every crystal is immediately visible, and every shifting obstruction is lit in a way that makes it readable even when it's in motion. If you want an endless ball runner with more moving parts, more things to collect, and more tools to push your distance record, Rolling Ball 3D is the game for it.
Key Details:
| Field | Info |
|---|---|
| Genre | Endless Runner / Arcade |
| Difficulty Level | Variable (escalates with waving platforms and shifting obstacles) |
| Average Play Time | 3–12 minutes per run |
| Best For | Slope fans, crystal collectors, power-up strategy players |
2. How to Play Rolling Ball 3D
Getting Started:
- Launch the game — the ball begins rolling down the neon ramps automatically.
- Steer left and right to stay on the ramp surface and avoid falling off the edges.
- Collect blue crystals scattered across the ramps as you roll over them.
- Navigate waving platform sections by adjusting your position in response to the platform's movement.
- Use accumulated crystals in the shop to purchase power-ups and unlock new ball models between runs.
Basic Controls:
| Key | Action |
|---|---|
A or ← Left Arrow | Steer ball left |
D or → Right Arrow | Steer ball right |
Objective: Roll as far as possible down the endless interconnected neon ramps without falling off an edge or colliding with an obstruction. Collect blue crystals to fund power-up purchases and ball model unlocks. Waving platforms and shifting obstructions add dynamic physical challenges on top of the static ramp geometry — adapt to both to set a new distance record.
3. Rolling Ball 3D Features & Highlights
✓ Waving platform sections — Dynamic platform geometry that actively moves during the run, requiring real-time positional adaptation rather than static obstacle avoidance.
✓ Shifting obstructions — Obstacles that change position mid-run, preventing memorisation from fully solving any section and keeping the challenge fresh across repeated attempts.
✓ Blue crystal collection system — Collectibles scattered across the neon ramps that accumulate across sessions and fund power-up purchases and ball model unlocks in the in-game shop.
✓ Power-up and ball unlock system — Purchasable run advantages and cosmetic ball models that provide both immediate performance benefits and long-term collection goals.
✓ Infinite neon ramp world — An endlessly generated series of interconnected ramps in a glowing neon environment, with no defined end point and a difficulty curve that escalates with every metre rolled.
4. Rolling Ball 3D Tips & Strategies
Beginner Tips:
- Don't ignore the power-up shop early on. Even a single affordable power-up purchased after your first few runs can meaningfully extend your subsequent sessions. Check the shop after every run and invest in the lowest-cost option available as soon as your crystal count allows.
- On waving platform sections, reduce your steering input frequency. The platform's movement is already shifting the ball's position. Adding large, frequent steering corrections on top of that movement compounds the positional instability rather than resolving it. Let the platform's wave settle into a rhythm and make single, deliberate corrections at the right moment.
- Collect blue crystals on your rolling line first, then assess off-path ones. Crystals sitting directly in your natural path cost nothing to collect. Crystals that require deviation introduce edge risk. Only chase off-path crystals when the surrounding space is clear enough that the deviation is genuinely safe.
Advanced Strategies:
- Use power-ups strategically, not just when available. Some power-ups are most valuable at the beginning of a run, when you're establishing position and the ramp difficulty is lower — useful for building a comfortable starting distance. Others are best saved for later stages, where the waving platforms and shifting obstructions create the highest collision probability. Match your power-up timing to where it provides the most run extension.
- Read shifting obstruction patterns before committing to a line. Shifting obstructions move in repeatable cycles. On first encounter, observe one full movement cycle before steering around the obstruction — you'll then know the exact timing of the safe window. This approach costs a fraction of a second but eliminates the guesswork that causes most shifting obstruction collisions.
- Prioritise ball unlock purchases that provide clearer visual reference. Some unlockable ball models are more visually distinct from the neon environment than others, making the ball's position on the ramp easier to read at high speed. If certain ball types are hard to track visually in the neon environment, switching to a model with better contrast against the platform colour can provide a genuine navigational advantage.
What to Watch Out For:
- Waving platforms timing out of sync with your steering rhythm. The most disorienting waving platform failures occur when the platform's wave happens to pull the ball toward an edge at the exact moment a steering correction is pushing it further in the same direction. When entering a waving section, deliberately pause your steering input for one wave cycle to establish the platform's rhythm before you start correcting against it.
- Shifting obstructions that move into safe corridors mid-traverse. Some shifting obstructions are timed to move into the safe gap just as the ball arrives at it — a sequence where the gap was clear when you committed to the line but closed by the time you reached it. Watch obstructions for full cycles before trusting a static "safe corridor" reading.
5. Rolling Ball 3D Elements Explained
Waving Platform System
Waving platforms are Rolling Ball 3D's most distinctive environmental mechanic and the feature that most clearly differentiates it from the static geometry of standard Slope games. Rather than fixed ramp sections with consistent surface orientation, waving platforms shift and undulate during play — their surface angle and position changing in rhythmic cycles that affect the ball's momentum and steering response in real time.
The practical effect of a waving platform is that the ball's position on the ramp is partially determined by the platform's current wave phase, not just by the player's steering input. A ball centred on a flat ramp behaves predictably to steering. A ball on a waving ramp at the peak of its cycle will drift differently than the same ball at the wave's trough. Players who treat waving platforms as static surfaces and apply their normal steering inputs without adjusting for the wave cycle consistently lose control mid-section.
Mastering waving platforms requires two simultaneous skills: reading the wave's current phase from the platform's visual geometry, and timing steering corrections to counteract the wave's directional influence rather than competing with it. The most efficient navigation through a waving section uses the wave itself as a partial control — surfing the platform's movement rather than fighting it.
Shifting Obstruction System
Shifting obstructions add a temporal dimension to Rolling Ball 3D's hazard design that static obstacles cannot provide. Rather than fixed blocks positioned at permanent locations on the ramp, shifting obstructions move through repeating cycles — occupying one position for a period, then another, then returning — creating hazards that are sometimes present and sometimes absent at the same point on the ramp.
This cyclical movement fundamentally changes how the game's obstacles must be approached. Static obstacles can be avoided by establishing a fixed steering line that routes around them. Shifting obstructions require timing awareness in addition to positional routing — the safe gap is real, but it only exists during part of the obstruction's cycle. Arriving at the right position but at the wrong moment of the cycle produces the same collision as arriving at the wrong position at any time.
The combination of shifting obstructions and waving platforms in the same ramp section — which occurs in more advanced run stages — creates Rolling Ball 3D's most demanding scenarios: dynamic surfaces that affect positional stability interacting with timed hazards that require precise cycle awareness. Navigating both simultaneously at the game's higher speeds is the defining challenge for players pursuing top distance scores.
Crystal & Power-Up Economy
The crystal and power-up economy ties Rolling Ball 3D's moment-to-moment collection challenge to a persistent progression system that gives every run lasting value. Blue crystals collected during runs accumulate in a shared currency pool that persists across sessions. This pool funds two categories of shop purchases: power-ups that provide active run benefits, and ball model unlocks that offer cosmetic variety and visual customisation.
Power-ups are the more immediately impactful category. They provide targeted run advantages — collision protection, attraction fields, multipliers — that directly extend what any given run can achieve. The question of which power-up to prioritise with limited early crystal budgets is the game's primary strategic decision outside of the run itself: the answer depends on which aspect of the run is currently limiting distance most severely.
Ball model unlocks serve a different function — they are longer-term collection goals that require accumulating significantly more crystals than individual power-ups cost. The sustained crystal farming required to unlock all available ball models gives experienced players who have stabilised their distance scores a persistent progression goal that keeps each session purposeful even when the marginal improvement in run length has plateaued.
6. Rolling Ball 3D Frequently Asked Questions
Q: How do I navigate waving platform sections without losing control? A: The key is to read the platform's wave rhythm before applying steering corrections. When you enter a waving section, observe one complete wave cycle and identify the direction and timing of the platform's movement. Then time your steering corrections to counteract the wave's directional pull at the appropriate moment rather than fighting it continuously. Less frequent, well-timed corrections outperform constant micro-adjustments on waving surfaces.
Q: What should I do when a shifting obstruction blocks the path I've committed to? A: Shifting obstructions that close during your approach are the most difficult scenarios in the game. The best preparation is to observe full obstruction cycles before committing to a route — never assume a safe gap is permanent without watching it through at least one complete cycle. If you're caught mid-approach with a closing obstruction, steer directly away from the obstruction's movement direction and accept a wider line around it rather than attempting to thread through a closing gap.
Q: Which power-up should I buy first with my crystals? A: The best first purchase depends on what's currently ending your runs. If collisions with shifting obstructions are the primary cause, collision protection offers the most immediate run extension. If crystal collection efficiency is the priority — building toward ball unlocks quickly — a crystal attraction or multiplier power-up compounds its value across every subsequent farming run. If no single hazard type dominates your failures, a general survival power-up that extends run length provides the broadest benefit.
Q: How do I unlock new ball models? A: Ball models are available for purchase in the in-game shop using blue crystals accumulated across runs. Each model has a specific crystal cost — check the shop to see the full roster and individual prices. The most efficient path to unlocking multiple ball models is combining crystal-focused runs (where survival is secondary to collection volume) with any available crystal multiplier power-ups to maximise yield per session.
Q: Is Rolling Ball 3D compatible with mobile devices? A: Rolling Ball 3D is playable in web browsers and is compatible with desktop and laptop computers using keyboard controls. Mobile browser compatibility varies by device, and the keyboard control scheme (A/D or arrow keys) is not available on touchscreens. For the most precise navigation on waving platforms and around shifting obstructions, desktop play with a keyboard provides the best control accuracy.
7. Games Like Rolling Ball 3D
If you like Rolling Ball 3D, you might also enjoy: